OpenGeneMed Demo
This document presents some step-by-step screenshots about the usage of the OpenGeneMed
system. The data and information shared about patients, genomic mutations and treatments are
simulated and for illustration purpose only.
These examples help the interested reader to navigate a fully functional and partially populated
system. The reader is guided through different steps that are common in the management of a
clinical study.
For more details on the idea, software architecture and implementation of OpenGeneMed, please
refer to a publication recently submitted:
Palmisano A., Li M. C., Polley E. C., Zhao Y., Simon R. M. OpenGeneMed: a portable, flexible and
customizable informatics hub for the coordination of next-generation sequencing studies in
support of precision medicine trials (Submitted for publication).
!! WARNING: This document describes the default configuration of the system and
does not
reflect changes that your system administrator may have implemented in your version of
OpenGeneMed. Before submitting any inquiry to the authors of this document, please contact your
system administrators to make sure your inquiry is not connected to changes they made to the
default configuration.
In this document, patients at different stages of registration, annotation and treatment
assignment process are presented to highlight fundamental steps in the management of a clinical
research project.
In particular, you can read more about:
- Clinical information and upload VCF for annotation
- Review variants, complete eligibility questions
- Assign a treatment
- General overview of a complete record
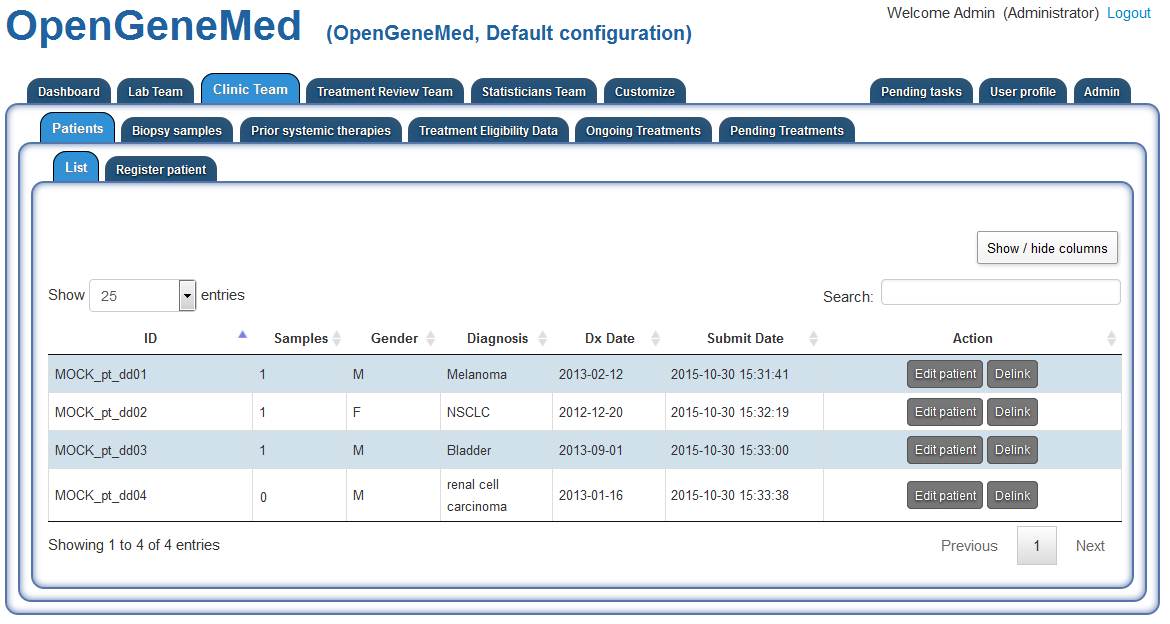
Access OpenGeneMed with an Administrative account to be able to view all the different steps
and roles.
In the default configuration, login details of an Admin account are
- username: opengenemed_admin@example.com
- password: aaaAAA111
The current list of patients can be accessed from different tabs. Here we access it from the Clinic Team/Patients tab. Different roles have different access to the list of patients.
Patient 1- MOCK_pt_dd01 - General overview of a complete record
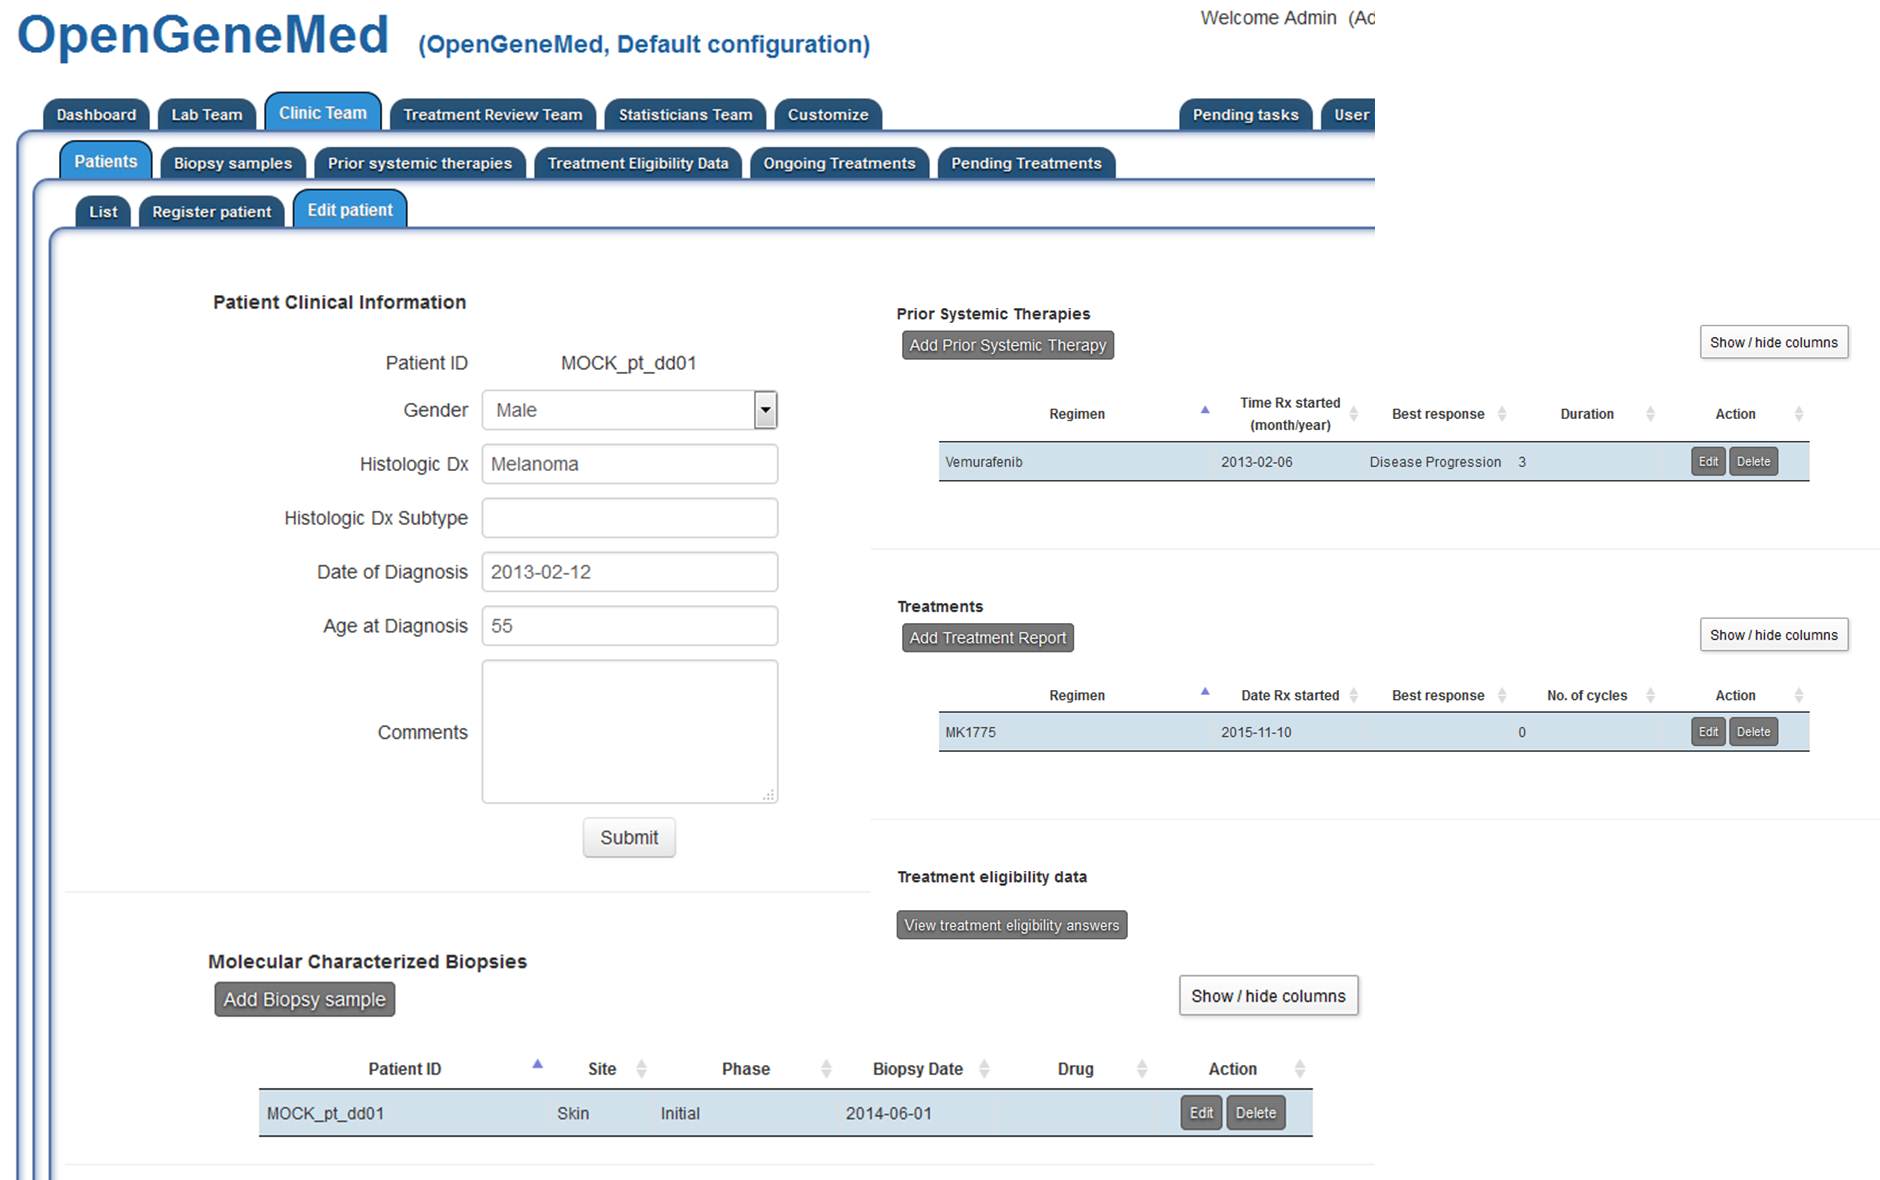
For patient "MOCK_pt_dd01", clicking the "Edit patient" from the table above will open the
complete record for the patient. Here basic clinical information can be edited/deleted.
More details on each step are described in the "User Manual" document.
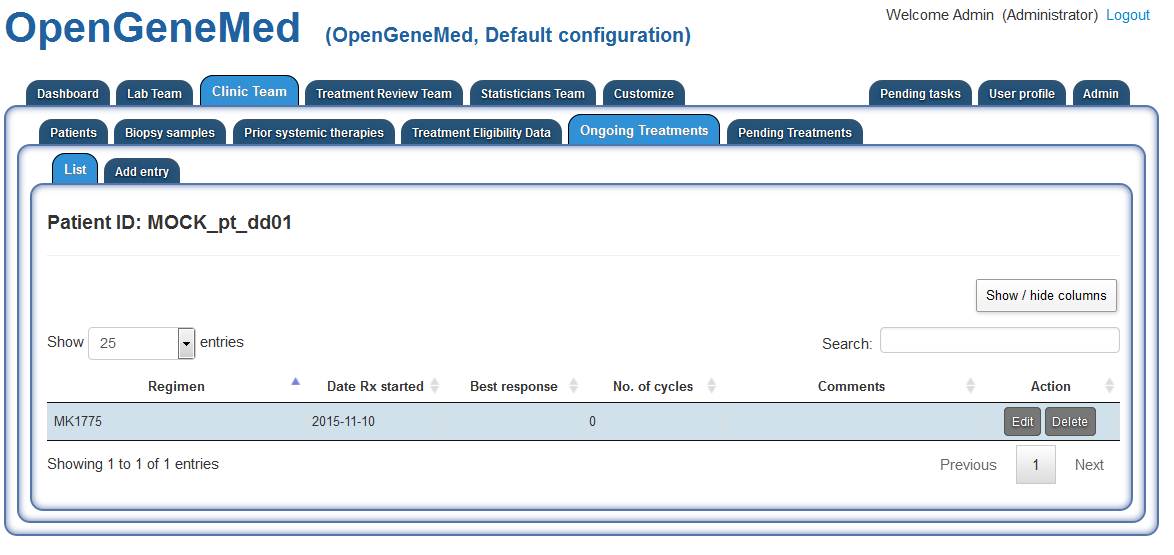
Accessing the "Ongoing Treatment" tab, we can see that this patient started one of the
treatments within the study
Patient 2- MOCK_pt_dd02 - Assign a treatment
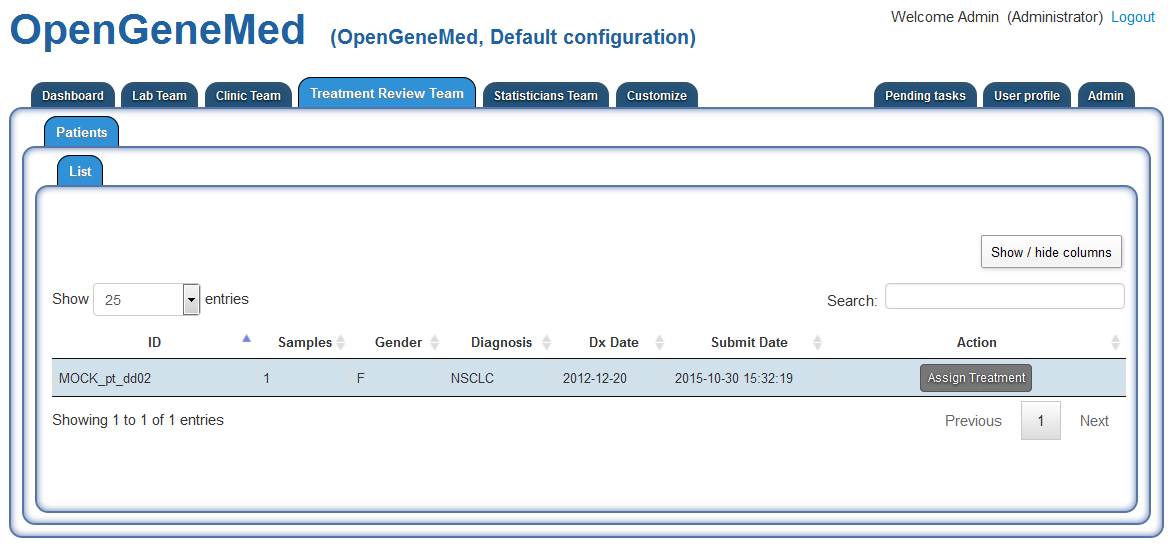
Accessing the "Treatment Review Team" tab, we can see that patient "MOCK_pt_dd02" is waiting
for a treatment to be assigned.
By clicking the "Assign Treatment" button, the member of the treatment review team will be
prompted all the patient information needed to assign the appropriate treatment.
All the data is displayed in different tabs (each shown below).
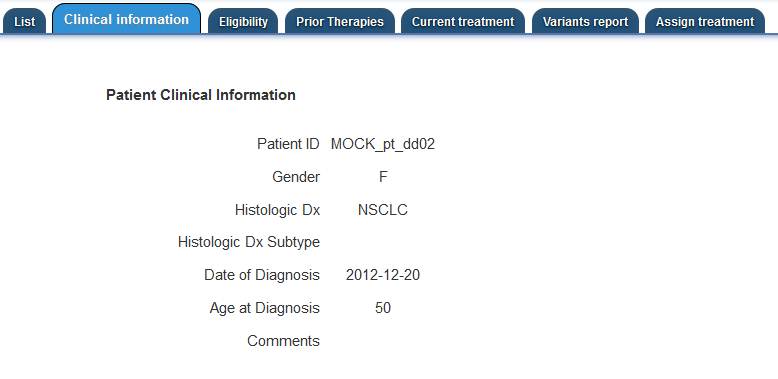
The first information that the Treatment Review member needs to assess is the Patient Clinical
Information.
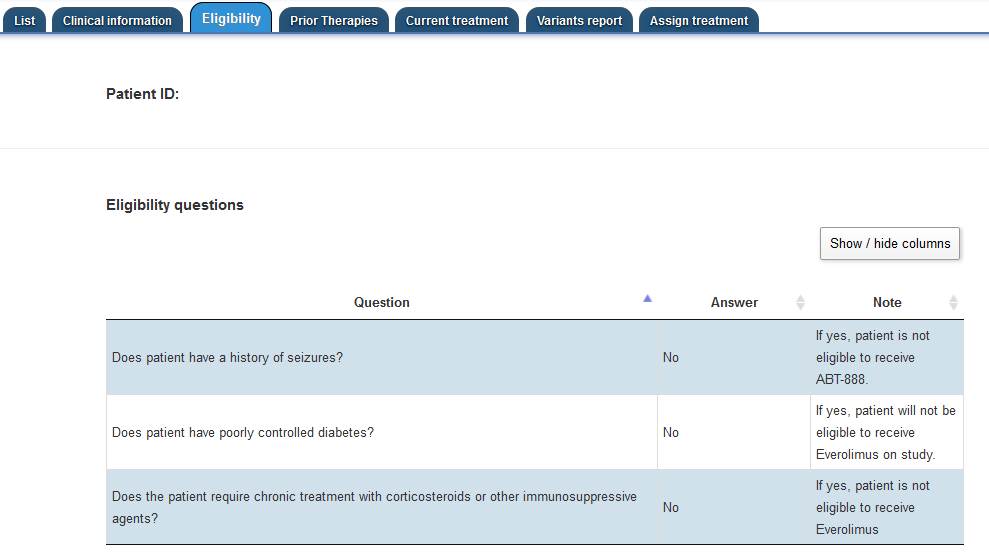
Then the Treatment Review member must assess the answers to the eligibility questions for the
patient.
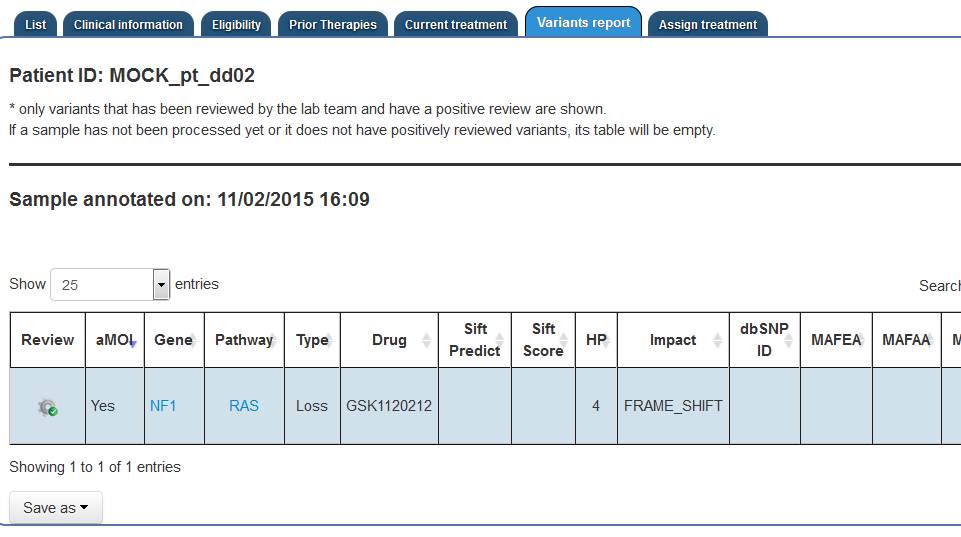
Finally, the Treatment Review member has access to the positively reviewed mutations found in
the patient tumor. The information is displayed in a concise and sortable table, with data about
the gene mutation, links to relevant pathway, allele frequency, read depth, etc.
Using the combined information from all these tabs, the Treatment Review member must access the
"Assign Treatment" tab (shown below).
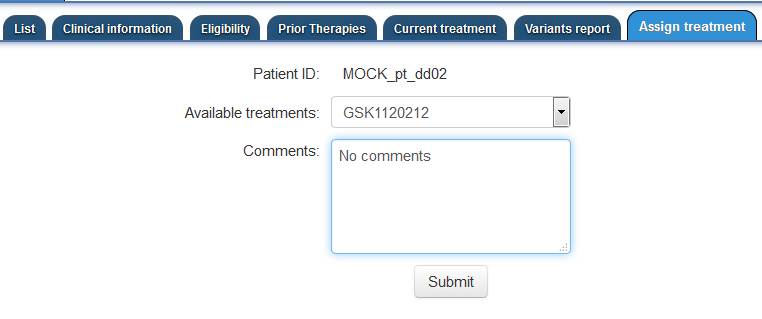
The treatment is selected from a drop down, listing all the available treatment for the study.
A section for comments is also provided and can be used to communicate specific
instructions/comments to the Clinical Team member who is going to deliver the treatment.
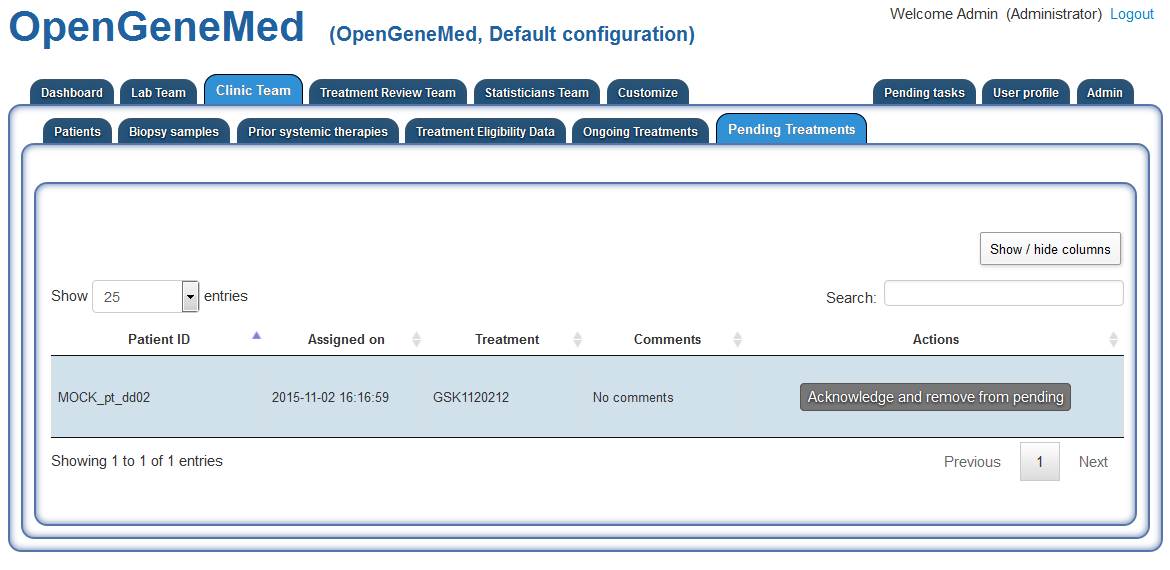
Once the treatment assignment is submitted, the Clinic Team members will receive a
notification of a "Pending Treatment".
Accessing the "Clinic Team" tab (and "Pending Treatment" sub tab) we can see the patient
and the assigned treatment. It is the Clinic Team member responsibility to take note of the
assignment and record this information in the "Ongoing Treament" tab once the treatment has
actually been delivered to the patient.
Patient 3- MOCK_pt_dd03 - Review variants, complete eligibility questions
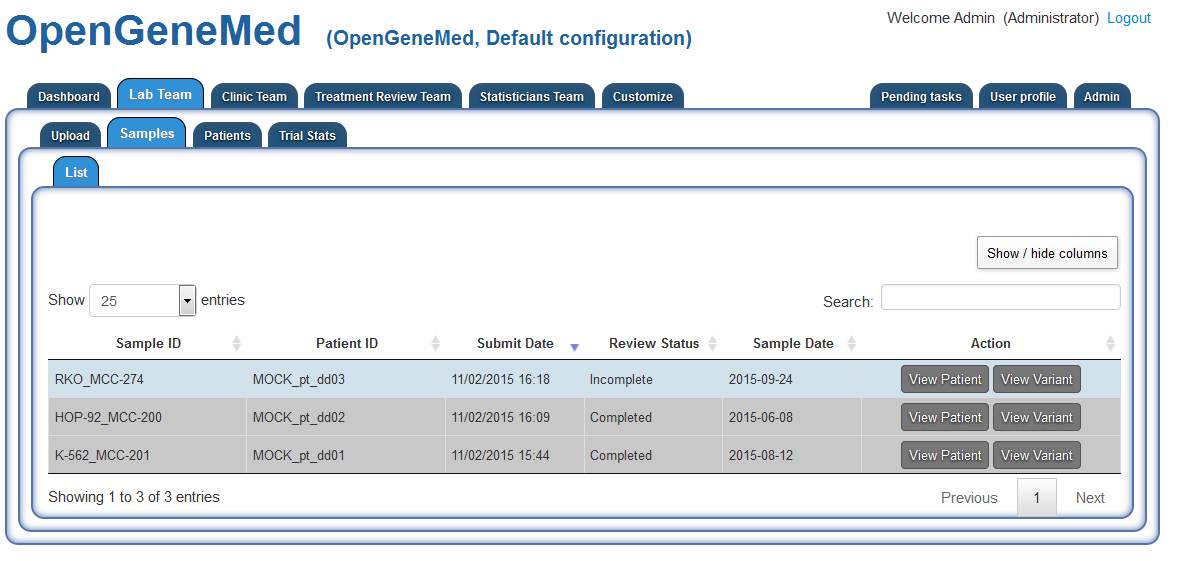
Accessing the "Lab Team" tab, we can see that patient "MOCK_pt_dd03" has an uploaded sample
that still requires review (it is not greyed out). Grey rows indicates samples that have been
reviewed and/or patients have already been assigned to treatment. The records remain in the
table for future reference.
Clicking the "View variant" in the first row will open the view showed below.
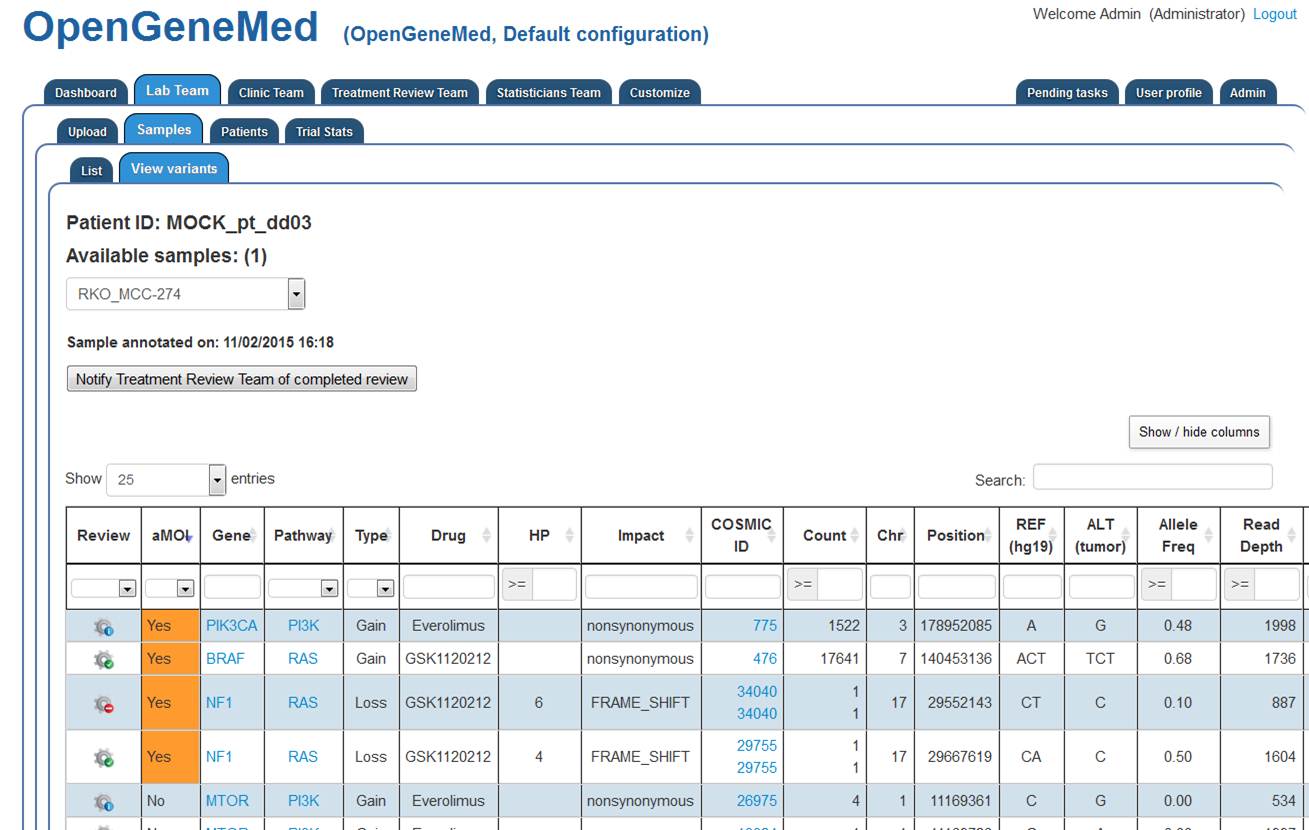
The variant mutation table is displayed on the screen. The table is sortable and we can
hidde/show columns of interest.
In particular, we can see that two of the four actionable mutations (the rows with aMOI "Yes")
have a green icon (Review accepted status), one of them has a red icon (Revier Rejected status)
and one has a blue icon (Not yet reviewed).
By clicking the "Review" icon of the first variant (PKI3CA row), we can see the specifics of the
variant and decide on its review status (see next step).
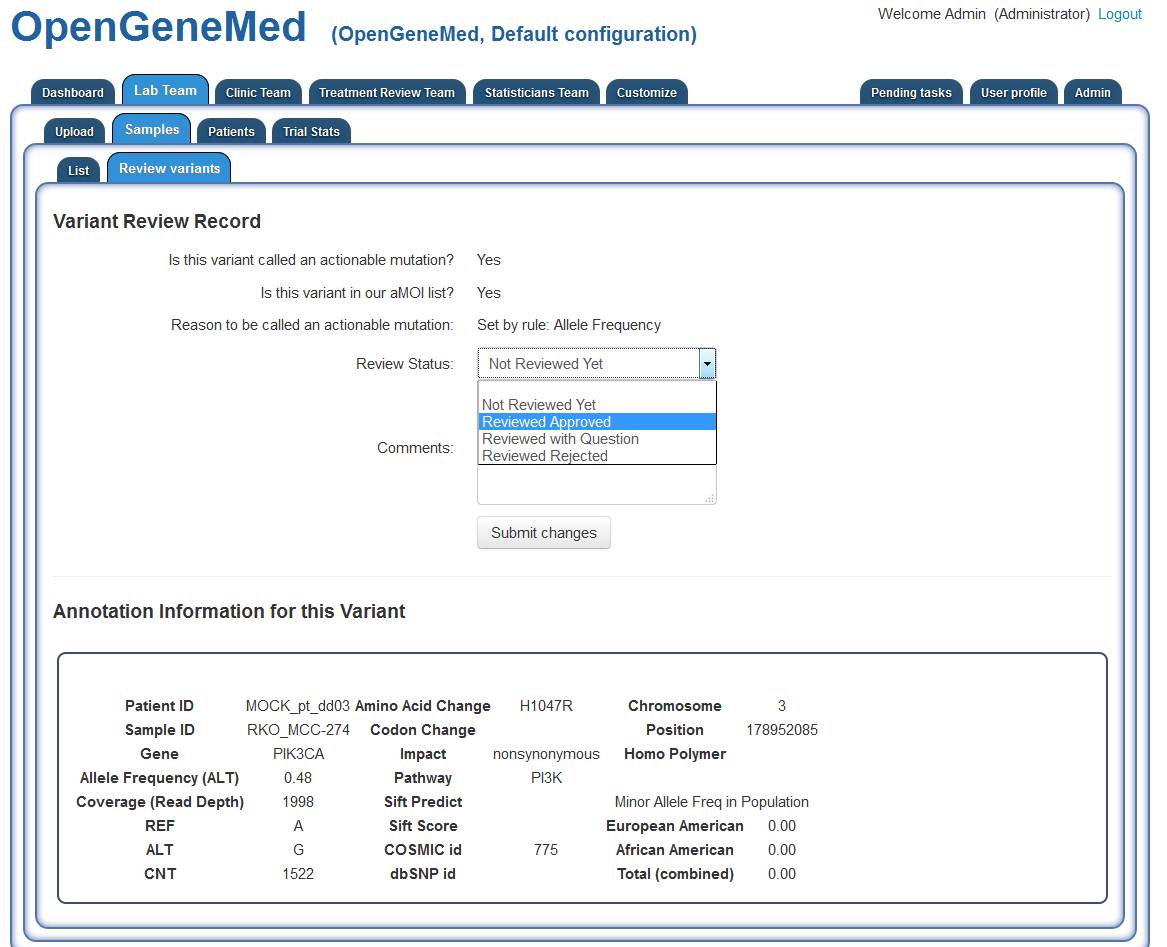
After reading all the information of the variant, the member of the Lab Team will make a
judgment call (based on rules specified in the study protocol) and the variant can be marked as
"Reviewed Approved".
Since now all the actionable mutations have been reviewed, the Lab Team member can notify the
Treatment Review Team of the completed review by using the button right above the variant table
(see previous step's screenshot).
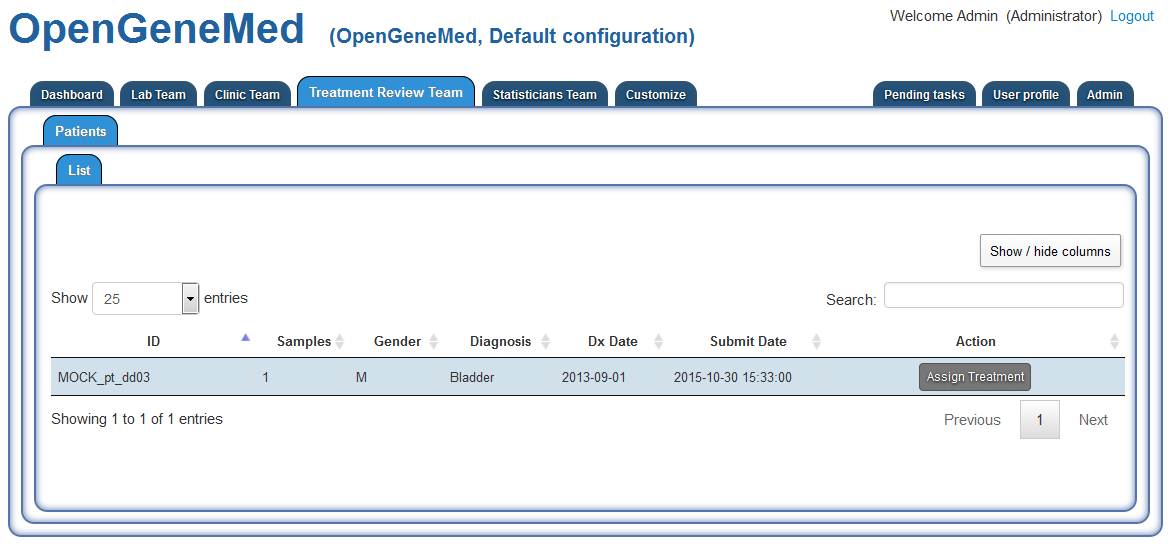
Accessing the "Treatment Review Team" tab, we can see that patient "MOCK_pt_dd03" is waiting
for a treatment to be assigned.
Following the same steps as the ones described for "MOCK_pt_dd02" a memember of the Treatment
Review Team should assess the patient information to assign the treatment.
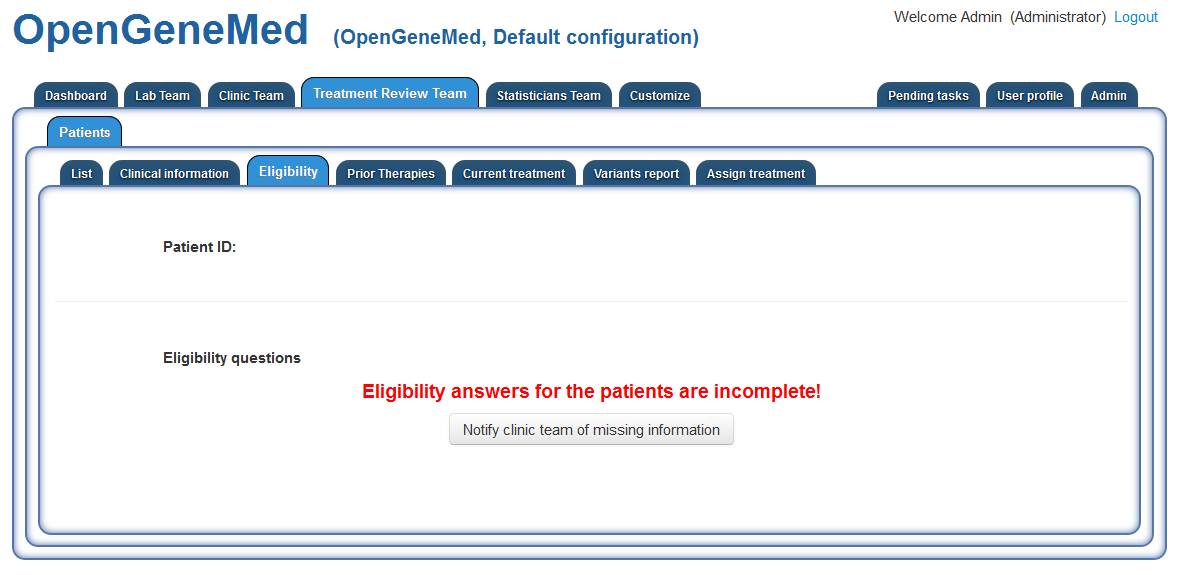
However, in this case, we can see that one of the key piece of information for treatment
assignement (i.e., the answers to eligibility questions) are missing.
Since the treatment assignment cannot proceed without this information, the Treatment Review
member can send a notification to the Clinic Team so that they could complete the missing
information.

Accessing the "Clinic Team" tab and "Treatment Eligibility Data" sub tab, a member of the
Clinic Team should enter the ID of the patient with incomplete information.
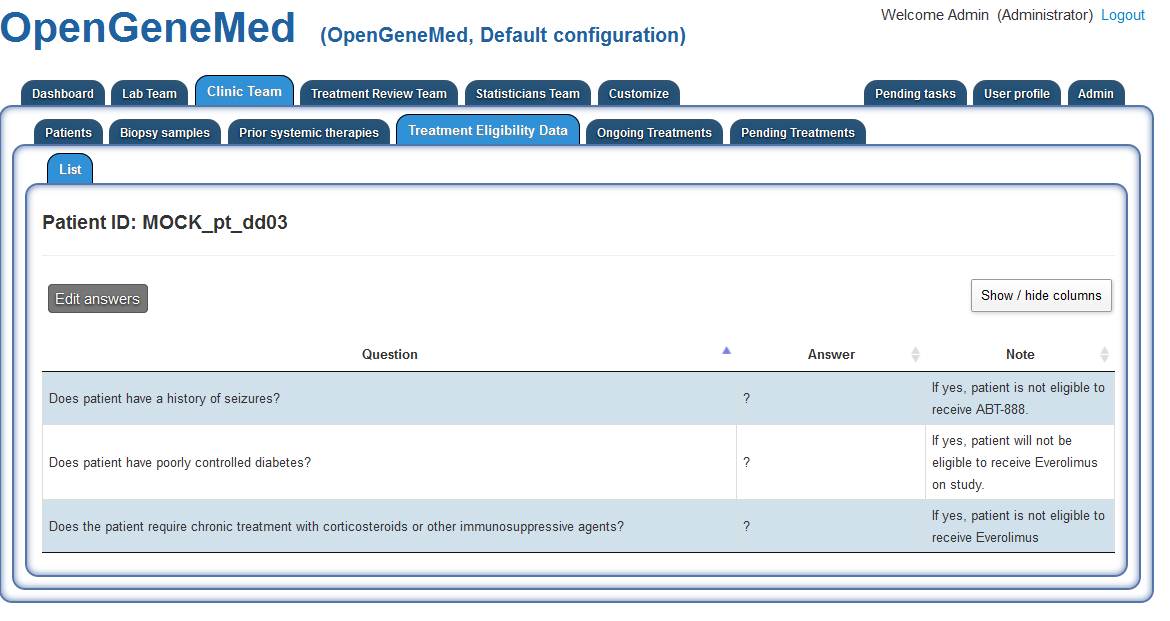
The list of eligibility questions of the study is presented in a table view and the Clinic
Team member can edit the answer by clicking the "Edit answers" button.
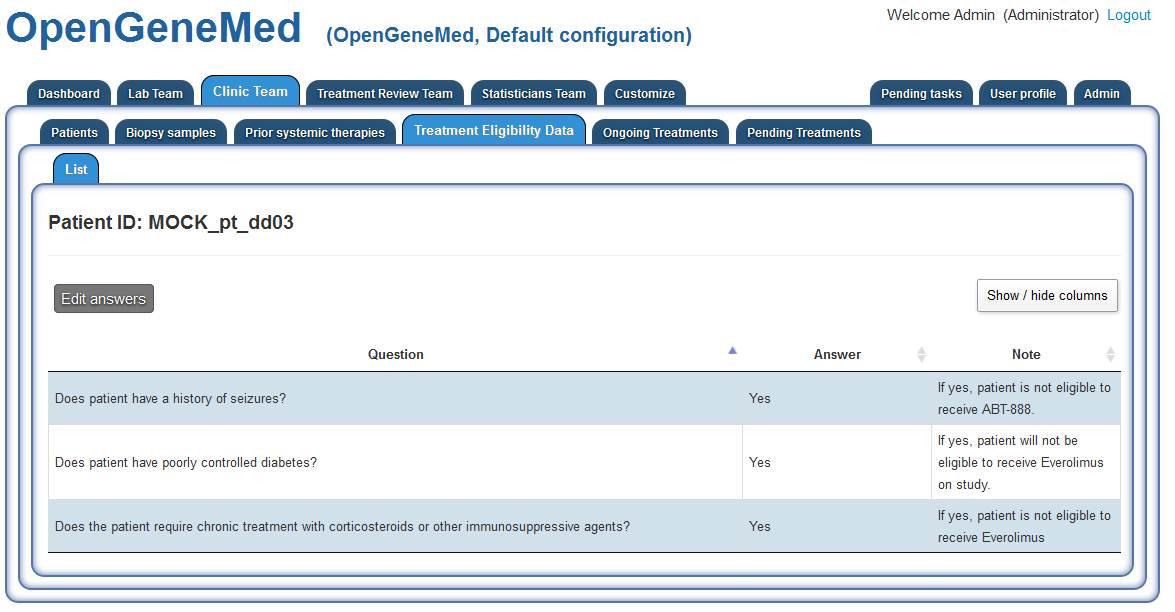
For this specific patient, all answers are answered with "Yes". Once this step is complete,
the Treatment Reveiw Team can proceed in assigning the treatment.
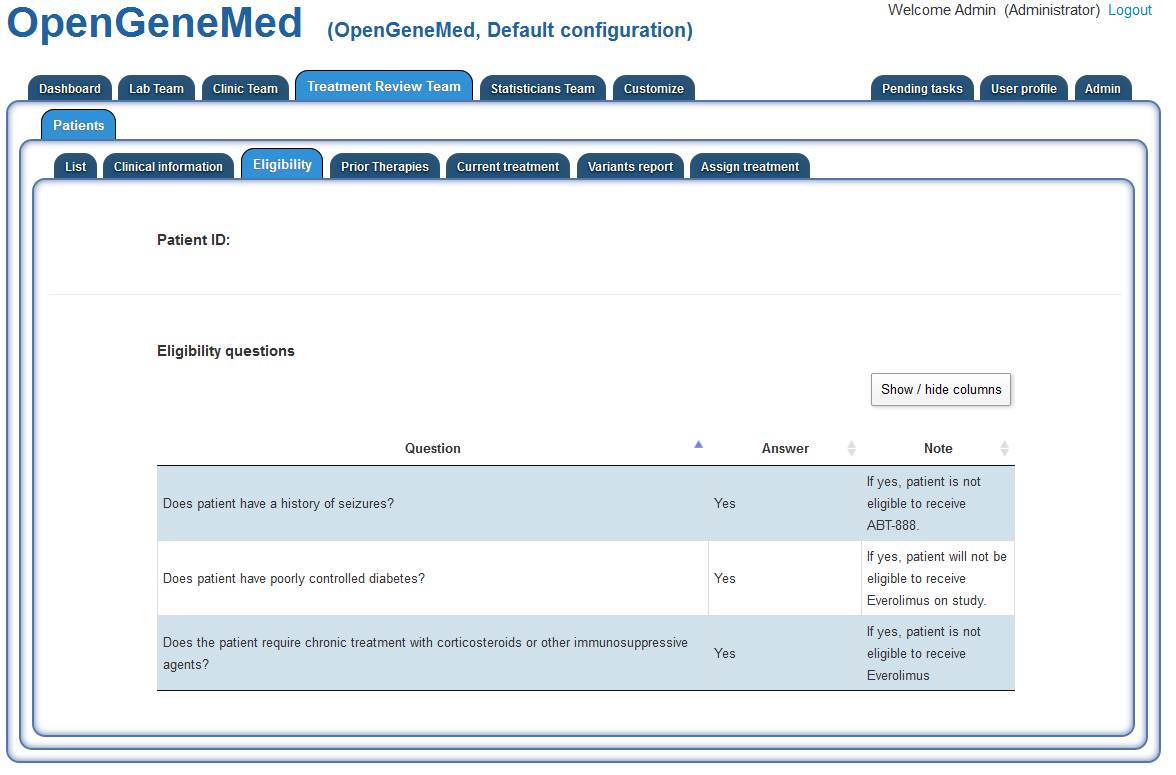
Accessing the "Treatment Review Team" tab and going thorught the same steps to assign the
treatment, we can now see the complete answers for the patient.
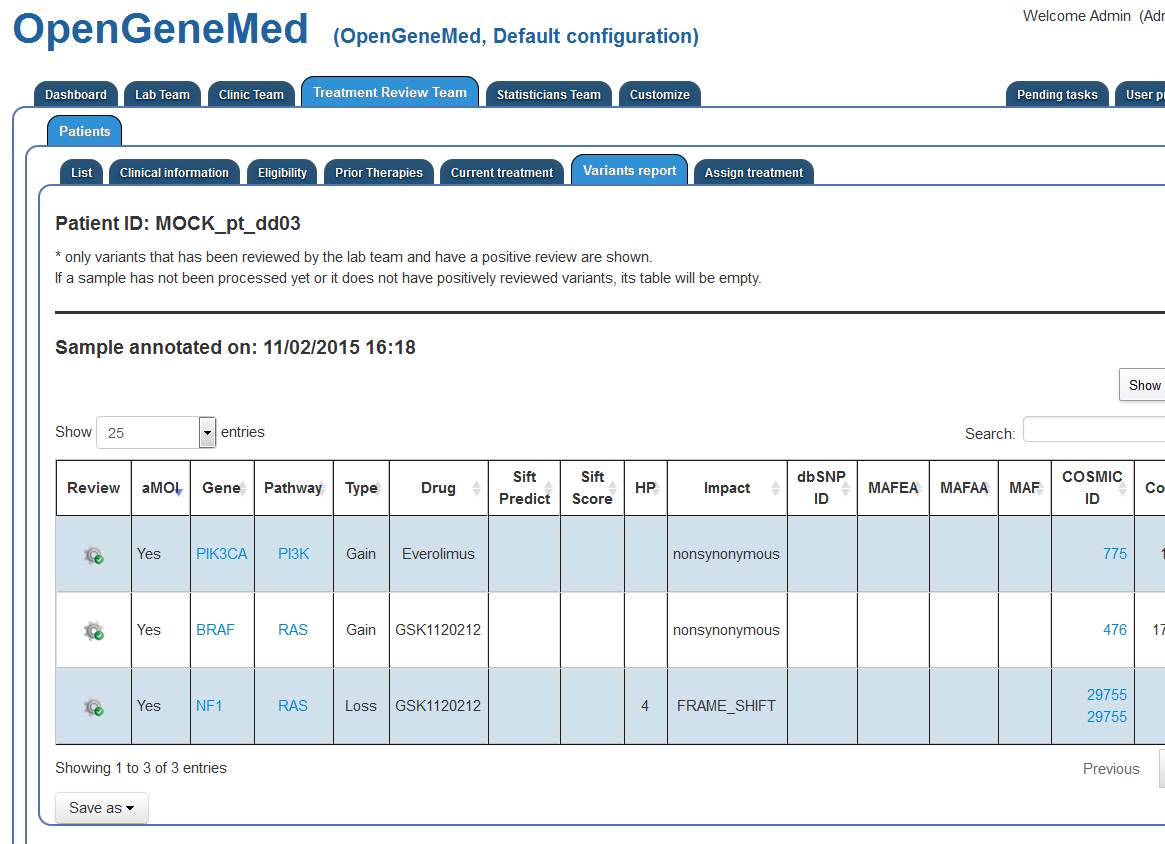
The Treatment Review member can now see the positively reviewed mutations found in the patient
tumor.
The information is displayed in a concise and sortable table, with data about the gene mutation,
links to relevant pathway, allele frequency, read depth, etc.
Even if the patient has multiple mutations and multiple choices for treatment assignment, the
information in the treatment eligibility questions excludes one of the drugs,
so as the Treatment Review member access the "Assign Treatment" tab, this information should be
used to select the appropriate treatment (shown below).
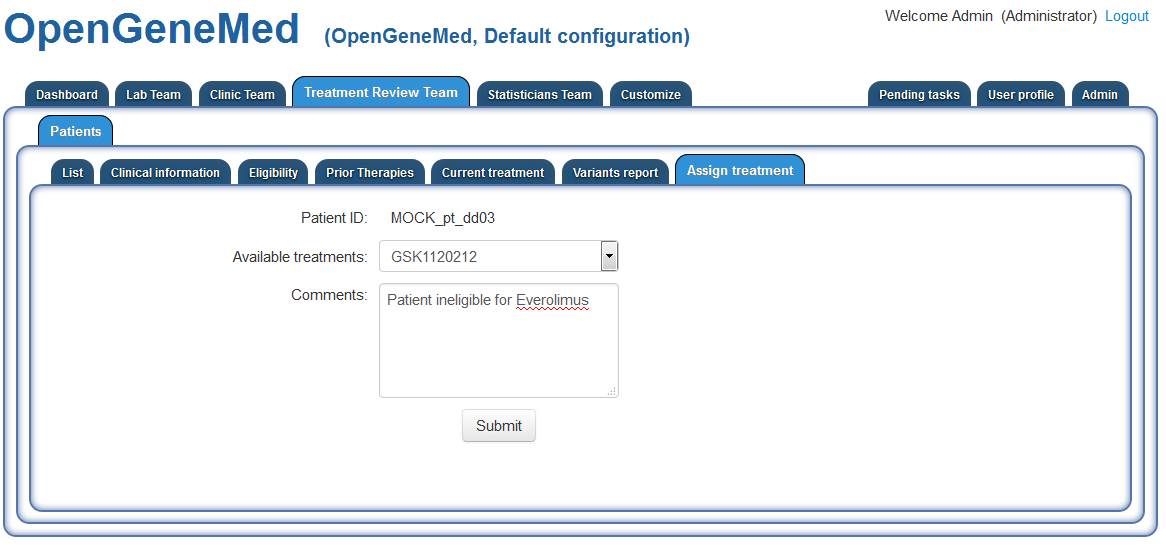
The appropriate treatment is chosen and a note is added just as a reminder for future
refences.
Patient 4- MOCK_pt_dd04 - Upload VCF and access variant table
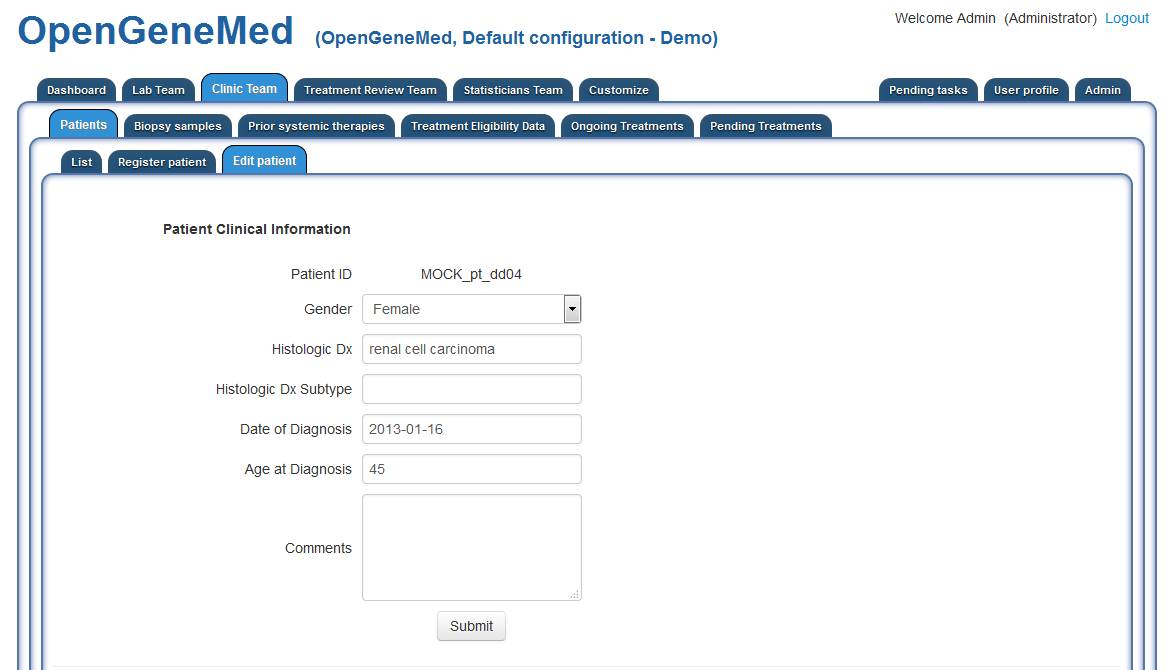
Clinical information displayed for the patient is visible to the Clinical Team. They can edit
the information, add biopsy samples, prior therapies, etc.
Detailed information about required information and the format is available in the User Manual.
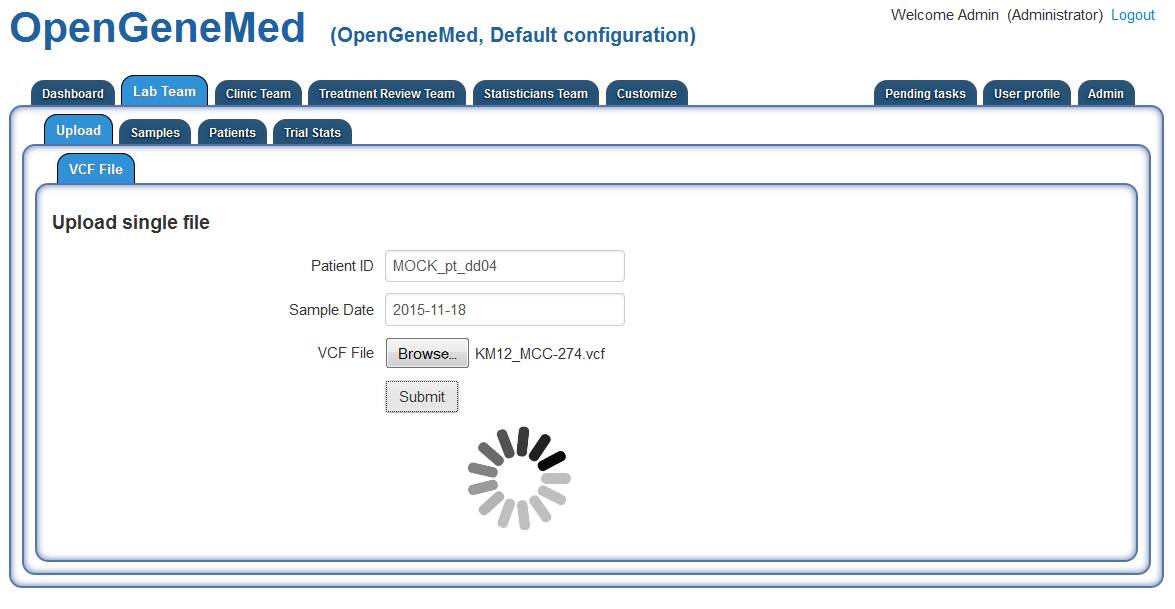
Once a patient is registered and a biopsy sample is taken and sequenced by the lab, a Lab Team
member needs to upload the VCF file in OpenGeneMed for annotation.
This can be done by accessing the "Lab Team" tab ("Upload" sub tab). On this page, we need to
input the patient id, the sample date and pick a VCF file to upload. Clicking "Submit" will
upload the file and start the annotation process. Once this step is completed, a link to the
report is displayed.
Detailed information about file format and requirements are described in the Technical
Documentation and User Manual.
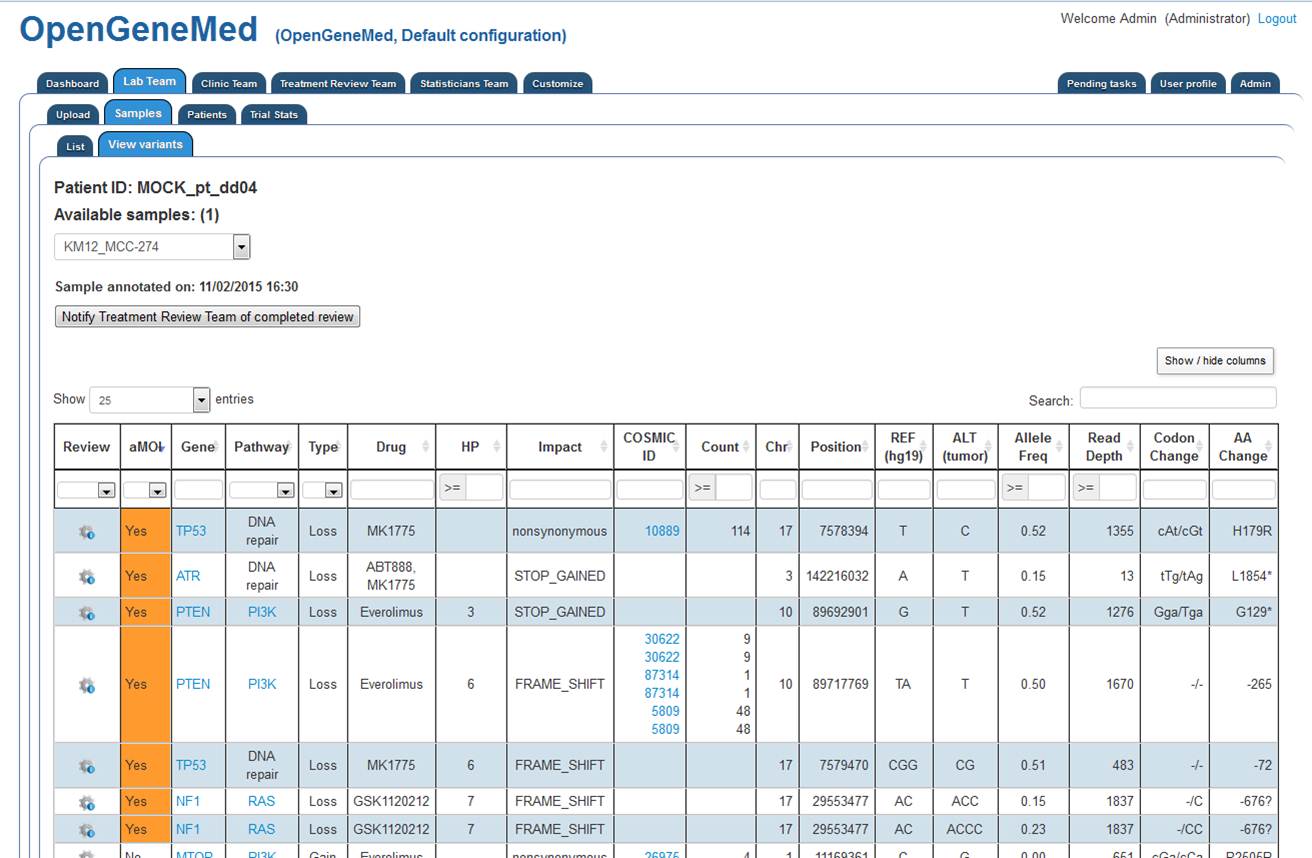
The variant mutation table is displayed on the screen. The table is sortable and we can
hidde/show columns of interest.
Each of the actionable mutations identified by OpenGeneMed should be reviewd by following the
steps listed in the examples presented above.


